Elasticsearch is a highly scalable open source search engine built on top of Apache Lucene and released under an Apache license. It is a tool for querying written words with some other nifty tasks but its core purpose is to work for wading through text, returning text similar to a query and statistical analysis of a collection of written texts.
In this post, we will explain how to setup and run Elasticsearch on Ubuntu 14.04 Server. Let’s start with following this detailed article for step-by-step instructions to setup Elasticsearch server in your environment.
Pre-requisites
Your operating system must be up to date and have sufficient privileges to perform system level tasks. As Elasticsearch is built using Java, it requires Java installation (atleast Java Version 7) to run. You must have the recommended version of Java 7 or later, else you will be refused to use Elasticsearch using the old version of Java.
System Update
To update your system with the latest updates, you need to login to your ubuntu server with root user and execute the command below.
root@ubuntu-14:~# apt-get update
After completion of above command, your system is up-to-date.
Java (JVM) Version
If you already have Java installed on your system, then it is great. But you need to confirm its version as per recommended by the Elasticsearch.
root@ubuntu-14:~# java -version

We can see that we already have Java version 7 installed on our Ubuntu 14.04 LTS.
Now we need to setup the JAVA_HOME environment variable to configure the Java version. To do so, open `.bashrc` file in your home directory to set `JAVA_HOME` variable.
root@ubuntu-14:~# vim .bashrc JAVA_HOME=/usr/lib/jvm/java export JAVA_HOME PATH=$PATH:$JAVA_HOME/bin
Save the changes and issue the below command to update the user profile.
root@ubuntu-14:~# source ~/.bashrc
Public Signing Key Setup for Elasticsearch
To download the latest release for the Elasticsearch on Ubuntu, we will get its key for the package from its official web site http://elastic.co and add to our local repository with the following command.
root@ubuntu-14:~# wget -O - http://packages.elasticsearch.org/GPG-KEY-elasticsearch | sudo apt-key add – </pre>

To save the repository to the `sources.list` file, we will use the `echo` command method to add the ElastricSearch repository with the below shown command.
root@ubuntu-14:~# echo "deb http://packages.elastic.co/elasticsearch/1.7/debian stable main" | sudo tee -a /etc/apt/sources.list.d/elasticsearch-1.7.list
Here is the output shown below in response to the above command.
deb http://packages.elastic.co/elasticsearch/1.7/debian stable main
Once we run the `apt-get update` command, our newly added repository will be ready to use for the installation of Elasticsearch package.
Installing Elasticsearch
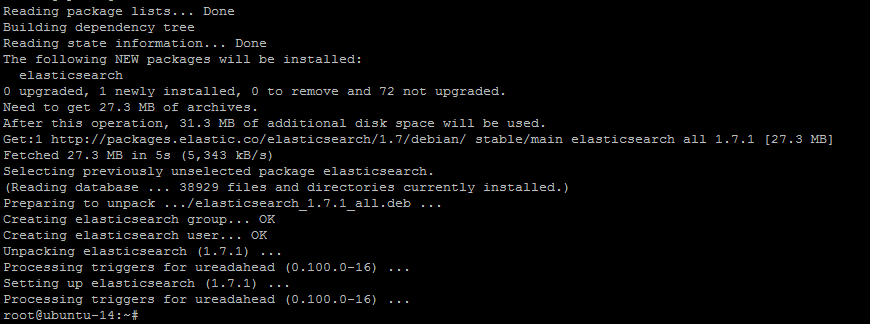
Our basic requirements for the installation of Elasticsearch has been setup. Run the following command to start the installation.
root@ubuntu-14:~# apt-get update && apt-get install elasticsearch
The above command will end up with the output shown below in the terminal.

Starting Elasticsearch Service
To start Elasticsearch service and then to configure it to automatically start at bootup, we will make use of the following command.
root@ubuntu-14:~# service elasticsearch start

The status shows that Elasticsearch service is running fine. Now, to enable it at boot-up, run the following command.
root@ubuntu-14:~# update-rc.d elasticsearch defaults 95 10

Elasticsearch Web Test
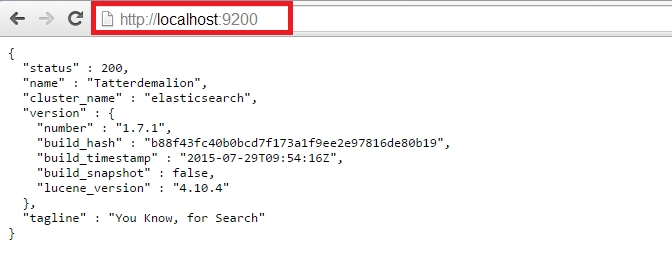
To check and confirm that everything is working, let’s open the link below in your web browser with Elasticsearch in its default port `9200` as shown below.
http://your_servers_ip:9200

Conclusion
Elasticsearch is simple to setup and use. At the end of this tutorial, you learned about the basics of Elasticsearch and its installation setup. We hope that this tutorial has given you a better understanding of what Elasticsearch is and how easily you can deploy it in your environment.