Clojure is a modern, functional programming for the JVM and a dialect of the Lisp (LISt Processing) that focuses on concurrent programming found in operating systems. Clojure is a functional programming language that features a concise syntax, elegant concurrency support and frictionless Java integration. It provides many built-in tools for using immutable objects that runs on the Java Virtual Machines designed to be a fantastic language in it’s own right, and not necessarily a glue language.You can build systems from the ground up in Clojure without ever touching Java code directly. Clojure is successfully used in industry by companies such as Walmart and Puppet Lab and other large software companies.
In this article we will be showing you the complete deployment steps of Clojure Web Application on Ubuntu 14.04.
System Preparation
Our first step is to prepare the system with its basic requirements before starting the application deployment. Let’s follow the basic instructions to complete the basic system requirements.
System Update
Login to your Ubuntu server using the root or sudo user credentials and run the command below to update your Operating system.
# apt-get update
SUDO User
It has always been a good practice to deploy a new application using the non-root user. To create a new sudo user on Ubuntu with a root user you can use the following steps to create new user and the assign ‘sudo’ rights.
# adduser vxx
You will be asked to provide the password and user information as show in the image.
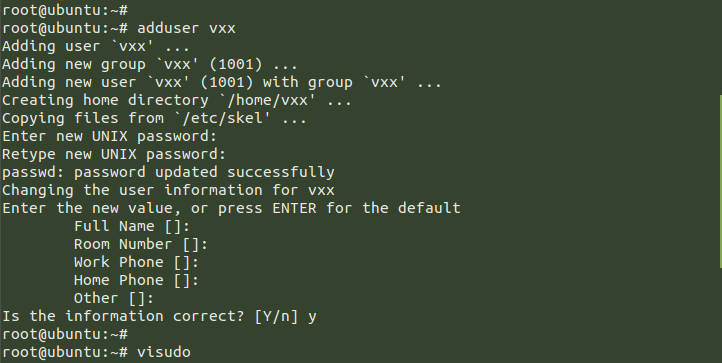
For assigning the ‘sudo’ rights to the newly created run the ‘visudo’ command and add the following line in it.
# Allow members of group sudo to execute any command
%vxx ALL=(ALL:ALL) ALL
Hit the ‘Ctrl+x’ key to save and close the file folled by ‘Y’ and Enter keys.
Installing Required Packages
The deployment of Clojure web application mainly depends upon the three software packages that is Java, Supervisor, and Nginx. So, these must be installed on your Ubuntu system for the success of this deployment.
We will be using the sudo user for the next steps, let’s switch to the newly created sudo user and then run the command below to install the required packages.
$ sudo apt-get install openjdk-7-jre-headless$ sudo apt-get install nginx supervisor
Cloning Sample Clojure App
We are going to use an example of Clojure project to deploy using its available git repository. You can download or directly clone its repository using ‘git clone’ command. If you are out of ‘git’ package then run the commands below to install the git package followed by the command to clone the sample Clojure repository.
$ sudo apt-get install git$ git clone https://github.com/do-community/do-clojure-web.git

Now we need to compile and run this sample project by using the “Leiningen”, which a dependency management and build automation tool for Clojure apps that makes this easy for the JVM based code.
So, we need to setup the Leiningen on our Ubuntu server by downloading its installation script using the below ‘Curl’ command.
$ sudo curl https://raw.githubusercontent.com/technomancy/leiningen/stable/bin/lein -o /usr/local/bin/lein
Give the executable permissions to the installation script using the command below.
$ sudo chmod a+x /usr/local/bin/lein

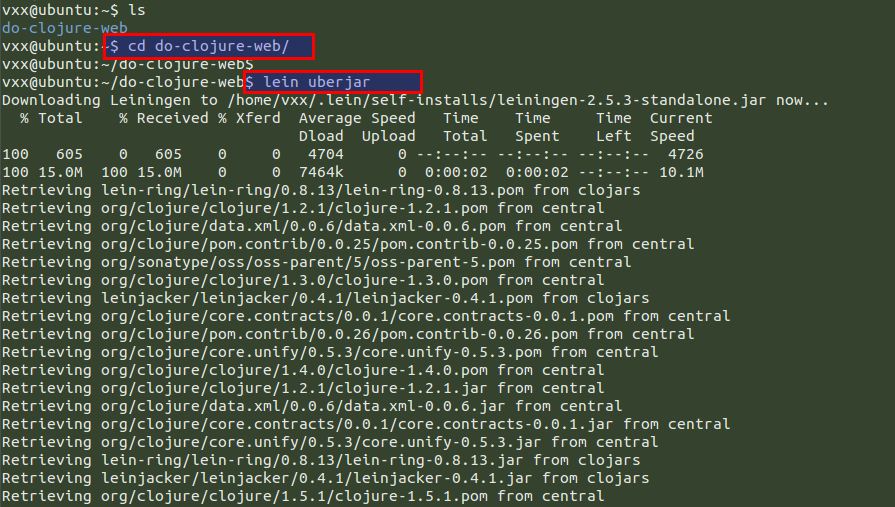
Now run the command as shown below to compile your sample clojure project with ‘lein’ on your Ubuntu server within its directory.
$ cd do-clojure-web/$ lein uberjar
Setup Clojure App Environment
Create the directory structure to place your Clojure web application and its log files in it as shown.
$ sudo mkdir -p /var/www/do-clojure-web/app/db /var/www/logs
Then copy your Clojure application file and database file into the directories we have created above.
$ sudo cp do-clojure-web/target/do-clojure-web-0.1.0-standalone.jar /var/www/do-clojure-web/app/$ sudo cp do-clojure-web/db/do-clojure-web.h2.db /var/www/do-clojure-web/app/db/
Change the ownership of application path to ‘www-data’ so that it can write to our built-in database using the www-data user on our system.
$ sudo chown -R www-data /var/www/do-clojure-web/
Then change your directory to the Clojure application directory and create a symbolink of current clojure web application to the current running version of the application. So that its can be interrupted by the system after each update.
$ cd /var/www/do-clojure-web/app/$ sudo ln -s do-clojure-web-0.1.0-standalone.jar do-clojure-web.jar
Your clojure application is ready to be used for localhost. Run the command below to make sure that it works fine and then hit ‘Ctrl+c’ key to stop the process at this point.
$ sudo java -jar do-clojure-web.jar

Configuring Supervisor for Clojure App
In this step we will be using the Supervisor for managing the Clojure Application service as a best option for running Clojure Application on our Ubuntu server.
Let’s create a new file within the Clojure configuration directory using your command line editor, then add the following line in it as shown.
$ sudo vim /etc/supervisor/conf.d/do-clojure-web.conf[program:do-clojure-web] command=/usr/bin/java -jar do-clojure-web.jar directory=/var/www/do-clojure-web/app user=www-data autostart=true autorestart=true startretries=3 redirect_stderr=true stdout_logfile=/var/www/logs/do-clojure-web.app.log
Save and close the file using the ‘:wq!’. The configuration file indicates that the Supervisor service will run our application from within the ‘/var/www/do-clojure-web/app’ directory and will make sure to generate the logs within the the mentioned log file.
Configuring Nginx as Reverse Proxy
In this last step we will be configuring the Nginx web server to use as a reverse proxy, because the Clojure web application only accepts connections from localhost on port 5000 and we need to provide it external access by using Nginx.
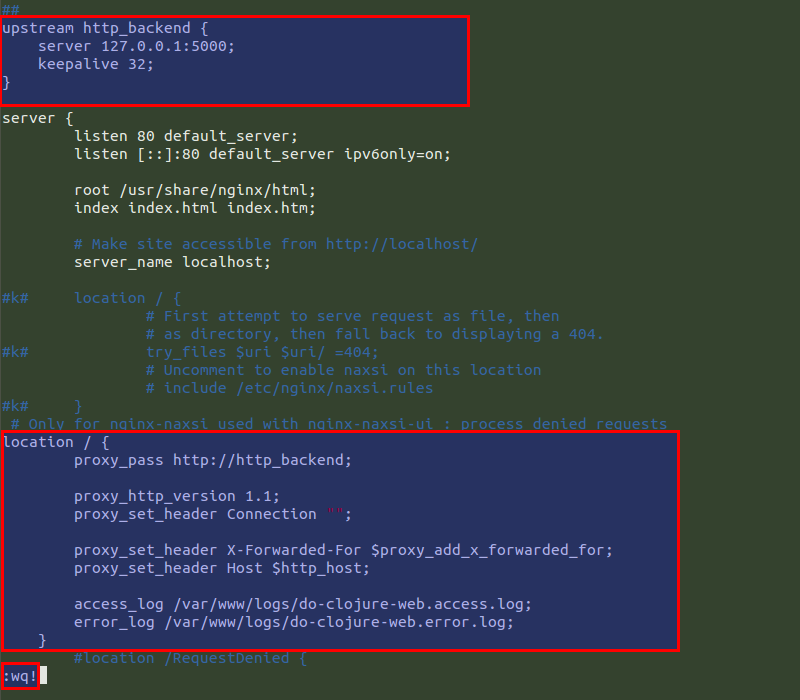
Open the default configuration file of Nginx, then add the following lined in it as shown below before the start of ‘server’.
upstream http_backend { server 127.0.0.1:5000; keepalive 32; }
Then comments out the lines all the lines starting from ‘location’ and the add the below lines in it.
location / { proxy_pass http://http_backend; proxy_http_version 1.1; proxy_set_header Connection ""; proxy_set_header X-Forwarded-For $proxy_add_x_forwarded_for; proxy_set_header Host $http_host; access_log /var/www/logs/do-clojure-web.access.log; error_log /var/www/logs/do-clojure-web.error.log; }
Save and close the file after making these changes. The complete configuration changes would be like the same as shown the below image.
Start Services:
We need to restart services of Nginx and Supervisor, to do so run the commands as shown below.
$ sudo service supervisor restart$ sudo service nginx restart

Testing Web Access
After successfully starting up services, you need to open up your wbe browser followed by the IP of your localhost server or FQDN. You will be greeted with the home page of Clojure Web application as shown below.
http://localhost/

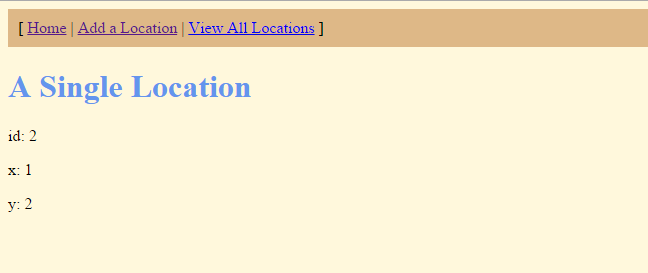
Click on the Add a Location button and give the values to ‘x’ and ‘y’ axis then click on the submit location button.
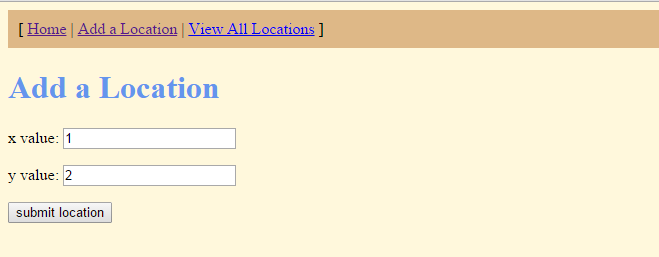
If you want to view all your submitted locations then click on the ‘View All Locations’ button.
Conclusion
We have successfully deployed Clojure web application using a sample Clojure application on Ubuntu 14.04 with supervisor, Nginx and lein. You can deploy your custom applications may be that is a simple website or an application. We hope have got this article much helpful while deployment of Clojure Applications on your Ubuntu server. You can contact us in case of any issue and we will surely get back to you with its solution.
Don’t forget to follow us on Twitter for news, updates and announcements – @vexxhost.